#
Idol Backend Tutorial
This is part 3 of our tutorial on building the Cryptoidol demo app; check out the backend and frontend.
Setting up the proving server is very involved. Perhaps you have better things to do and would prefer a hosted service that computes proofs for your application. We now offer a managed service, ezkl hub, which takes care of all this work.
Click here to join the waiting list and try out ezkl hub.
#
Overview
So you have trained the model and obtained the public key and verifier key. There’s a new problem: how are you going to serve the proofs to your users?
To do this we need a server. There are a number of ways to build a server. In this tutorial we will leverage the python bindings and use the Flask web framework because it is quick and easy to use. We’ve found that many teams using ezkl end up building their own proof server, so we decided to make a simple one part of a tutorial repo to save you time.
#
Step 1. Setting up the Flask App
We are going to use poetry https://python-poetry.org/ as a way of managing our packages. If you are already familiar with npm and yarn, poetry is the equivalent in python. It has the added benefit of resolving package dependencies which ensures that you have all the compatible versions needed.
First, install poetry https://python-poetry.org/docs/. After you install poetry you can simply run
poetry init This will setup a poetry environment in the root of your repository. Follow the setup instructions provided. You can skip the dependency setup in the poetry init script for now. We will use the add command instead to install the dependencies.
poetry add flask ezkl celery redis librosa gunicorn flask-cors pydub mclbn256There may be a need to install other system dependencies. So if the install fails, try running the following (if you are on a Debian system).
apt-get install -y gcc g++ cmake make gfortran pkg-config libffi-dev git curl ffmpeg libavcodec-extra libssl-devIn the root of your repository, create a [app.py](http://app.py) file to set up the initial server. We’re going to keep things simple here and not use blueprints. The backend is mostly going to be a REST API server. Create a test server as such.
# app.py

from flask import Flask, jsonify
from flask_cors import CORS

app = Flask(__name__)
CORS(app)

@app.route('/', methods=['GET'])
def index():
    return jsonify({'status': 'ok', 'res': "Welcome to ezkl proving server"})

if __name__ == "__main__":
		app.run(port=8000)
Access the poetry virtual environment by calling
poetry shellAfter which you may then start the server by calling
python app.pyIn your browser you should be able to see the index endpoint when you navigate to the localhost:
Congratulations! You have just set up a basic Flask server.
#
Step 2: Setting up Celery
Now we need a way of proving things without blocking the server. While it is possible to use asynchronous python to achieve this, it might be better to delegate the proofs to another process entirely. One way of achieving this is with a job queue and worker processes that can pick up jobs from that job queue. The Python ecosystem has Celery which does this well.
For Celery to work, we will need Redis and RabbitMQ, Redis is a key-value database to pass results to and from various worker processes. RabbitMQ is the message passing service for the job queue. Now append to the existing app.py with the following
# app.py
from flask import Flask, jsonify
from flask_cors import CORS
from celery import Celery

app = Flask(__name__)
CORS(app)

# Add the config for celery here
app.config["CELERY_BROKER_URL"] = os.getenv('APP_BROKER_URI')
app.config["TEMPLATES_AUTO_RELOAD"] = True
celery = Celery('worker', backend=os.getenv('APP_BACKEND'),
                broker=app.config["CELERY_BROKER_URL"])

celery.conf.update(app.config)

@app.route('/', methods=['GET'])
def index():
    return jsonify({'status': 'ok', 'res': "Welcome to ezkl proving server"})

if __name__ == "__main__":
		app.run(port=8000)
Now, if you try to start the server it should fail. This is because the various environment values are not set up. While you can manually run redis and rabbitmq locally, it’s much simpler to use docker for this. We will use docker compose to orchestrate this. Install docker first.
In the root of the repo, create a docker-compose.yaml file and add in the following.
# docker-compose.yaml

services:
  web:
    build: .
    links:
      - redis
      - rabitmq
      - worker
    depends_on:
      - redis
      - rabitmq
      - worker
    environment:
      FLASK_ENV: "development"
      APP_BROKER_URI: "pyamqp://guest@rabitmq:5672"
      APP_BACKEND: "redis://redis:6379/0"
      CELERY_RESULT_BACKEND: "redis://redis:6379/0"
    volumes:
      - .:/code
    ports:
      - "6000:8000"
    entrypoint: poetry
    command: run gunicorn app:app -w 3 -b 0.0.0.0:8000 --timeout 120

  redis:
    image: "redis"

  rabbitmq:
    image: "rabbitmq"

  worker:
    hostname: worker
    environment:
      APP_BROKER_URI: "pyamqp://guest@rabbitmq:5672"
      APP_BACKEND: "redis://redis:6379/0"
      CELERY_RESULT_BACKEND: "redis://redis:6379/0"
    build:
      context: .
    entrypoint: poetry
    command: run celery -A app.celery worker --loglevel=info
    links:
      - redis
      - rabbitmq
    depends_on:
      - redis
      - rabbitmq
    volumes:
      - .:/code
We will create 4 services, web hosts the python server and serves the app via gunicorn. redis runs the redis key-value database for results, rabbitmq will be the message passing service for the queue, and worker is the celery worker that will compute proofs.
Setup a new Dockerfile in the root of the repository containing the following.
FROM --platform=linux/amd64 python:3.9.6-slim
WORKDIR /code
ENV FLASK_APP=app.py
ENV FLASK_RUN_HOST=0.0.0.0
RUN apt-get update
RUN apt-get install -y gcc g++ cmake make gfortran pkg-config libffi-dev git curl ffmpeg libavcodec-extra libssl-dev

# Copy only requirements to cache them in docker layer
WORKDIR /code
COPY poetry.lock pyproject.toml /code/
# Project initialization:
RUN poetry install
Now with that setup you should be able to build and run the server with the following commands
# build the docker compose setup
docker compose build

# run the server detached
docker compose up -d

# check if the set up is working by viewing logs
docker compose logs

# check if processes are live with
docker compose ps

# if you want to remove volumes and containers after you're done
# note that the volumes here do not matter for the time being as the
# containers are mostly stateless. Proofs are ephemeral.
docker compose down -v
If it is working you should be able to navigate to your browser at 0.0.0.0:8000 now and view the default message. If not something is wrong and we will need to debug it!
#
Step 3: Setting up the proving service
Now with celery setup we can create an endpoint to receive proofs. We will also need all the various artifacts. Append the following to app.py
# app.py
# add request here
from flask import Flask, jsonify, request
from flask_cors import CORS
from celery import Celery

# add additonal dependencies
import json
import ezkl
import tempfile
import librosa
import os
from pydub import AudioSegment
from mclbn256 import Fr

app = Flask(__name__)
CORS(app)

# Add the config for celery here
app.config["CELERY_BROKER_URL"] = os.getenv('APP_BROKER_URI')
app.config["TEMPLATES_AUTO_RELOAD"] = True
celery = Celery('worker', backend=os.getenv('APP_BACKEND'),
                broker=app.config["CELERY_BROKER_URL"])

celery.conf.update(app.config)

# add artifacts folder here
with open(ARTIFACTS_PATH + "/server_settings.json", 'r') as f:
    SERVER_SETTINGS = json.load(f)

MODEL_PATH = os.path.join(
    ARTIFACTS_PATH, SERVER_SETTINGS["model_path"])

SETTINGS_PATH = os.path.join(
    ARTIFACTS_PATH, SERVER_SETTINGS["settings_path"])

PK_PATH = os.path.join(
    ARTIFACTS_PATH, SERVER_SETTINGS["pk_path"])

SRS_PATH = os.path.join(
    ARTIFACTS_PATH, SERVER_SETTINGS["srs_path"])

@app.route('/', methods=['GET'])
def index():
    return jsonify({'status': 'ok', 'res': "Welcome to ezkl proving server"})

# add the task to process audio here
def extract_mel_spec(filename):
    x,sr=librosa.load(filename,duration=3,offset=0.5)
    X = librosa.feature.melspectrogram(y=x, sr=sr)
    Xdb = librosa.power_to_db(X, ref=np.max)
    Xdb = Xdb.reshape(1,128,-1)
    return Xdb

def extract_bytes_addr(addr):
    addr_int = int(addr, 0)
    rep = Fr(addr_int)

    ser = rep.serialize()

    first_byte = int.from_bytes(ser[0:8], "little")
    second_byte = int.from_bytes(ser[8:16], "little")
    third_byte = int.from_bytes(ser[16:24], "little")
    fourth_byte = int.from_bytes(ser[24:32], "little")

    return [first_byte, second_byte, third_byte, fourth_byte]

def u64_to_fr(array):
    reconstructed_bytes = array[0].to_bytes(8, byteorder='little') \
                            + array[1].to_bytes(8, byteorder='little') \
                              + array[2].to_bytes(8, byteorder='little') \
                                + array[3].to_bytes(8, byteorder='little')
    return Fr(reconstructed_bytes)

@celery.task
def compute_proof(addr, audio):  # witness is a json string
    if not addr.startswith('0x'):
        addr = '0x' + addr
    addr_ints = extract_bytes_addr(addr)
    with tempfile.NamedTemporaryFile() as pffo:
        with tempfile.NamedTemporaryFile() as wfo:
            # write audio to temp file
            wfo.write(audio)
            wfo.flush()

            val = extract_mel_spec(wfo.name)

            # 0 pad 2nd dim to max size
            if val.shape[2] < 130:
                val = np.pad(
                    val, ((0, 0), (0, 0), (0, 130-val.shape[2])))
            # truncate to max size
            else:
                val = val[:, :, :130]

            inp = {
                "input_data": [[addr_ints], val.flatten().tolist()],
            }

            witness = tempfile.NamedTemporaryFile()
            audio_input = tempfile.NamedTemporaryFile(mode="w+")
            # now save to json
            json.dump(inp, audio_input)
            audio_input.flush()

            wit = ezkl.gen_witness(audio_input.name, MODEL_PATH,
                             witness.name, settings_path=SETTINGS_PATH)

            res = ezkl.prove(witness.name, MODEL_PATH,
                       PK_PATH,
                       pffo.name,
                       SRS_PATH, 'evm', 'single', settings_path=SETTINGS_PATH)

            # this is the quantized scord, which we convert to an int:
            score = u64_to_fr(wit["output_data"][1][0]).__int__()

            res = {
                "output_data": score,
                "proof": res['proof'],
            }

        return res

@app.route('/prove', methods=['POST'])
def prove_task():
    try:
        address = request.form['address']
        f = request.files['audio'].read()
        result = compute_proof.delay(address, f)
        result.ready()  # returns true when ready
        res = result.get()  # bytes of proof

        return jsonify({'status': 'ok', 'res': res})

if __name__ == "__main__":
		app.run(port=8000)
Once this is setup you may want to restart the docker containers just to be doubly sure that new code is running.
docker compose down -v
docker compose build
docker compose up -d
docker compose logs
If everything is working properly, record an audio sample of yourself or find any audio file and use the following curl command to double check if the prove endpoint is working. For example:
curl -F address=0x1 -F audio=@audio.wav http://0.0.0.0:8000/proveIf the prover is working nicely you should receive the output_data and proof.
#
Step 4: Serving in Production
You will want to secure the redis and rabbitmq by setting up credentials for them and the modifying the environment variables for them.
See the following tutorial for redis: https://nickjanetakis.com/blog/docker-tip-27-setting-a-password-on-redis-without-a-custom-config
See the following tutorial for rabbitmq: https://cloudinfrastructureservices.co.uk/create-rabbitmq-docker-container-image/
The setup will differ depending on the threat vectors, cloud providers, and how you would like to secure the backend.
We will also need ssl certificates, to do this we need an additional certbot and nginx service.
Append the following in the docker-compose.yaml file:
services:
  web:
    build: .
    links:
      - redis
      - rabitmq
      - worker
    depends_on:
      - redis
      - rabitmq
      - worker
    environment:
      FLASK_ENV: "development"
      APP_BROKER_URI: "pyamqp://guest@rabitmq:5672"
      APP_BACKEND: "redis://redis:6379/0"
      CELERY_RESULT_BACKEND: "redis://redis:6379/0"
    volumes:
      - .:/code
    ports:
      - "6000:8000"
    entrypoint: poetry
    command: run gunicorn app:app -w 3 -b 0.0.0.0:8000 --timeout 120
  redis:
    image: "redis"
  rabitmq:
    image: "rabbitmq"
  worker:
    hostname: worker
    environment:
      APP_BROKER_URI: "pyamqp://guest@rabitmq:5672"
      APP_BACKEND: "redis://redis:6379/0"
      CELERY_RESULT_BACKEND: "redis://redis:6379/0"
    build:
      context: .
    entrypoint: poetry
    command: run celery -A app.celery worker --loglevel=info
    links:
      - redis
      - rabitmq
    depends_on:
      - redis
      - rabitmq
    volumes:
      - .:/code

### add this
  nginx:
    restart: always
    build:
      context: ./nginx
      dockerfile: Dockerfile
    ports:
      - "80:80"
      - "443:443"
    links:
      - web
    depends_on:
      - web
    volumes:
      - ./nginx/nginx.conf:/etc/nginx/conf.d/nginx.conf
      - ./data/certbot/conf:/etc/letsencrypt
      - ./data/certbot/www:/var/www/certbot
  certbot:
    image: certbot/certbot
    restart: unless-stopped
    volumes:
      - ./data/certbot/conf:/etc/letsencrypt
      - ./data/certbot/www:/var/www/certbot
    entrypoint: "/bin/sh -c 'trap exit TERM; while :; do certbot renew; sleep 12h & wait $${!}; done;'"
Now create a ./nginx folder in the root of your repository. We will create two files ./nginx/Dockerfile and ./nginx/nginx.conf . In the Dockerfile we just need to remove the default.conf nginx file to replace with our own.
# ./nginx/Dockerfile
FROM nginx:1.21.0-alpine

RUN rm /etc/nginx/conf.d/default.conf
Then in the ./nginx/nginx.conf we need to specify how the reverse proxy should work.
Important! You will need a domain for the ssl to work. You may purchase it from services like namecheap, google domains, godaddy, so on. You will also need to obtain a Debian or Ubuntu box to host the server.
In the ./nginx/nginx.conf add the following
upstream web {
    server web:8000;
}

server {
    listen 80 default_server;
    server_name backend.cryptoidol.tech;

    location /.well-known/acme-challenge/ {
        root /var/www/certbot;
    }

    location / {
        return 301 https://$host$request_uri;
    }

}

server {
    listen 443 ssl;
    server_name backend.cryptoidol.tech;
    server_tokens off;

    ssl_certificate /etc/letsencrypt/live/backend.cryptoidol.tech/fullchain.pem;
    ssl_certificate_key /etc/letsencrypt/live/backend.cryptoidol.tech/privkey.pem;

    location / {
        proxy_pass http://web;
        proxy_set_header X-Forwarded-For $proxy_add_x_forwarded_for;
        proxy_set_header Host $host;
        proxy_read_timeout 300s;
        proxy_connect_timeout 75s;
        client_max_body_size 10M;
    }
}
You will now want to upload the entire repo to a Debian machine to host the server. You may do this with ftp or creating a git repo and cloning the repo into the server. Now in the server, run the same docker compose functions to set things up.
docker compose build
docker compose up -d
Check if your 443 and 80 ports are exposed via your DNS provider. We will need them exposed for the certbot challenge to obtain ssl certificates for your server. Copy the following script into your server to setup the challenge. Change the domains to the ones you have. This script was provided by this repo https://github.com/wmnnd/nginx-certbot/blob/master/init-letsencrypt.sh. You may want to set staging to 1 to perform a dry run, repeatedly spamming the script to debug can cause rate limits to be hit.
#!/bin/bash
if ! [ -x "$(command -v docker-compose)" ]; then
echo 'Error: docker-compose is not installed.' >&2
exit 1
fi
domains=(example.org www.example.org)
rsa_key_size=4096
data_path="./data/certbot"
email="" # Adding a valid address is strongly recommended
staging=0 # Set to 1 if you're testing your setup to avoid hitting request limits
if [ -d "$data_path" ]; then
read -p "Existing data found for $domains. Continue and replace existing certificate? (y/N) " decision
if [ "$decision" != "Y" ] && [ "$decision" != "y" ]; then
exit
fi
fi
if [ ! -e "$data_path/conf/options-ssl-nginx.conf" ] || [ ! -e "$data_path/conf/ssl-dhparams.pem" ]; then
echo "### Downloading recommended TLS parameters ..."
mkdir -p "$data_path/conf"
curl -s https://raw.githubusercontent.com/certbot/certbot/master/certbot-nginx/certbot_nginx/_internal/tls_configs/options-ssl-nginx.conf > "$data_path/conf/options-ssl-nginx.conf"
curl -s https://raw.githubusercontent.com/certbot/certbot/master/certbot/certbot/ssl-dhparams.pem > "$data_path/conf/ssl-dhparams.pem"
echo
fi
echo "### Creating dummy certificate for $domains ..."
path="/etc/letsencrypt/live/$domains"
mkdir -p "$data_path/conf/live/$domains"
docker-compose run --rm --entrypoint "\
openssl req -x509 -nodes -newkey rsa:$rsa_key_size -days 1\
-keyout '$path/privkey.pem' \
-out '$path/fullchain.pem' \
-subj '/CN=localhost'" certbot
echo
echo "### Starting nginx ..."
docker-compose up --force-recreate -d nginx
echo
echo "### Deleting dummy certificate for $domains ..."
docker-compose run --rm --entrypoint "\
rm -Rf /etc/letsencrypt/live/$domains && \
rm -Rf /etc/letsencrypt/archive/$domains && \
rm -Rf /etc/letsencrypt/renewal/$domains.conf" certbot
echo
echo "### Requesting Let's Encrypt certificate for $domains ..."
#Join $domains to -d args
domain_args=""
for domain in "${domains[@]}"; do
domain_args="$domain_args -d $domain"
done
# Select appropriate email arg
case "$email" in
"") email_arg="--register-unsafely-without-email" ;;
*) email_arg="--email $email" ;;
esac
# Enable staging mode if needed
if [ $staging != "0" ]; then staging_arg="--staging"; fi
docker-compose run --rm --entrypoint "\
certbot certonly --webroot -w /var/www/certbot \
$staging_arg \
$email_arg \
$domain_args \
--rsa-key-size $rsa_key_size \
--agree-tos \
--force-renewal" certbot
echo
echo "### Reloading nginx ..."
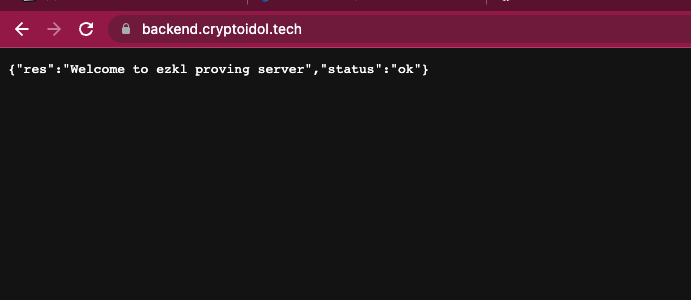
docker-compose exec nginx nginx -s reloadIf the setup ran correctly you should now have certbot serving ssl certificates on your server. You should be able to go to your domain at [https://backend.myserver.com](https://backend.myserver.com) and see the same success message and also run proofs on [https://backend.myserver.com/prove](https://backend.myserver.com/prove)
#
Conclusions and ezkl Hub
If you have gone through all these steps you should now have a live server that is able to serve proofs!
Setting up the proving server is very involved. Perhaps you have better things to do and would prefer a hosted service that computes proofs for your application. We now offer a managed service, ezkl hub, which takes care of all this work.
Click here to join the waiting list and try out ezkl hub.